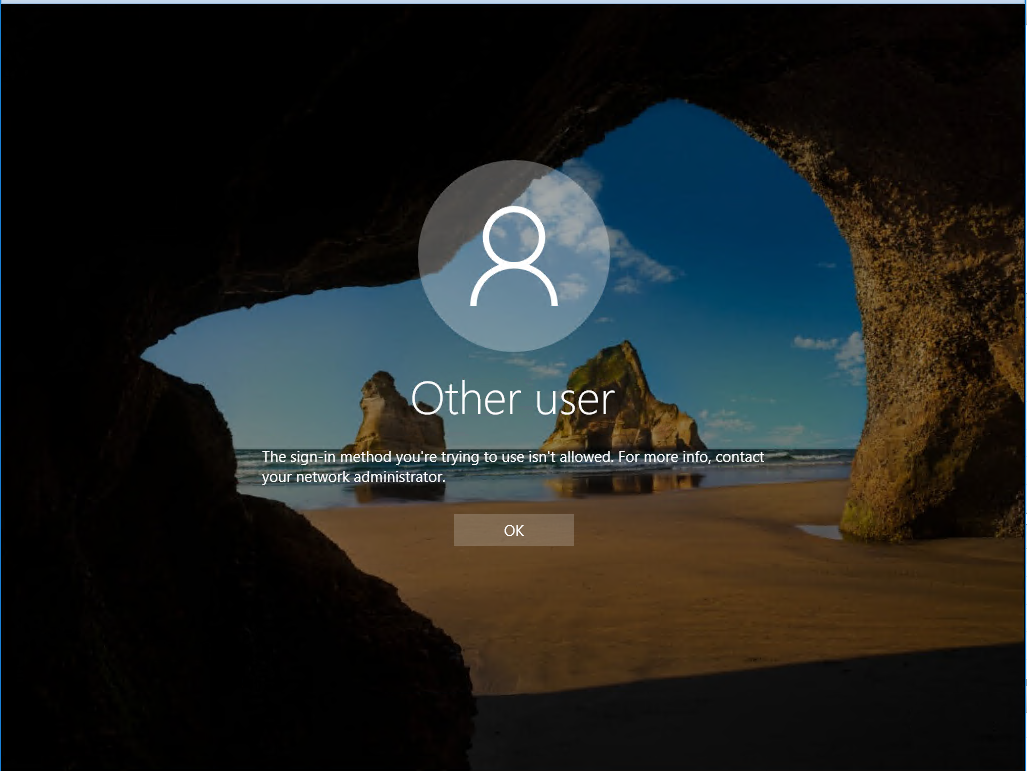
Case: tạo user trên AD windows 2016. sau đó log in trên màn hình console thì báo lỗi. Hướng xử lý như sau:
Quay lại sử dụng user administrator
1) Open the Group Policy editor using gpmc.msc
2) Select your domain and expand Group Policy Objects then right click on "Default Domain Controller Policy"    and Click Edit
3) Under Computer Management, expand Policies and then select Windows Settings
4) Expand Security Settings and Select Local Policies and then click on User Rights Management
5) Right click on Allow Logon Locally and click on Properties
6) In the next screen you can Add the User of Group that you want
Hoặc
1) Open the Group Policy editor using gpmc.msc
2) Select your domain and expand Group Policy Objects then right click on "Default Domain Controller Policy"    and Click Edit
3) Under Computer Management, expand Policies and then select Windows Settings
4) Expand Security Settings and Select Local Policies and then click on User Rights Management
5) Right click on Deny log on locally and click on Properties
6) In the next screen you can remove the User of Group that you want
Khi có user log in vào máy qua SSH, các file trong thư mục /etc/profile.d/ sẽ được thực thi. Lợi dụng việc này, ta sẽ viết script để tự động gửi mail thông báo khi có ai đó log in thành công
Thiết kế:
/opt/batch/backup_web/mail.py   File gửi mail, được viết bằng python
/etc/profile.d/notify_login.sh  File sh, sẽ được chạy mỗi khi login, file này sẽ gọi tới file python ở trên để gửi mail
Nội dung cả 2 file:
File mail.py
#!/usr/bin/python
# -*- coding: utf-8 -*-
# coding=utf-8
import sys
import smtplib
import os
from email.MIMEMultipart import MIMEMultipart
from email.MIMEBase import MIMEBase
from email.MIMEText import MIMEText
from email import Encoders
import datetime
def mail(to='abcd@gmail.com', subject='Email backup du lieu', text='day la body', attach='/var/log/secure'):
  gmail_user='abcd@gmail.com'
  gmail_pwd='ebzrmwozqckeqcoa'
  msg = MIMEMultipart()
  msg['From'] = 'abcd@gmail.com'
  msg['To'] = to
  msg['Subject'] = subject
  msg.attach(MIMEText(text+"\r\n"+datetime.datetime.today().strftime('%Y-%m-%d')))

  part = MIMEBase('application', 'octet-stream')
  part.set_payload(open(attach, 'rb').read())
  Encoders.encode_base64(part)
  part.add_header('Content-Disposition',
          'attachment; filename="%s"' % os.path.basename(attach))
  msg.attach(part)

  mailServer = smtplib.SMTP("smtp.gmail.com", 587)
  mailServer.ehlo()
  mailServer.starttls()
  mailServer.ehlo()
  mailServer.login(gmail_user, gmail_pwd)
  mailServer.sendmail(gmail_user, to, msg.as_string())
  # Should be mailServer.quit(), but that crashes...
  mailServer.close()

mail(subject=sys.argv[1], text=sys.argv[2], attach=sys.argv[3])
File sh
#!/bin/bash

sendmailpy=/opt/batch/backup_web/mail.py
ACCESS_IP=`/bin/echo $SSH_CLIENT | awk '{ print $1 }'`
SUBJECT="$ACCESS_IP Đã truy cập"
BODY="$(date) => $SSH_CLIENT đã truy cập bằng user $USER"
attach_local=/var/log/secure
/bin/nohup /usr/bin/python $sendmailpy $SUBJECT "$BODY" $attach_local >> /var/log/ssh_login_$(date +%F) &
Thông tin về email sử dụng để gửi cảnh báo được định nghĩa trong file mail.py
Lưu ý: Sử dụng trên gmail thấy google chặn đăng nhập đối với các user sử dụng password chính, còn đối với các user bật xác minh 2 bước, sử dụng pass ứng dụng thì google cho đăng nhập thoải mái. các bạn lưu ý.
Bước 1: cần có 1 con bot trên telegram, cách tạo bot các bạn chat với @botfather và làm theo hướng dẫn. Sau khi thực hiện, sẽ có token trả về, sử dụng để authen đối với các request tới bot
token có dạng đại loại như:
481775980:NAGtU-UYFQfYhufthedUAwMB2XWzRc8F6AA
Bước 2: tạo 1 room chat với con bot chúng ta vừa tạo, cứ tạo cuộc trò chuyện mới sau đó add con bot mới vào.
Bước 3: Lấy chat ID của cuộc trò chuyện vừa tạo
sử dụng URL có định dạng:
https://api.telegram.org/bot<token của bot>/getUpdates
VD: https://api.telegram.org/bot481775980:NAGtU-UYFQfYhufthedUAwMB2XWzRc8F6AA/getUpdates
call lên url mới có với header: “Content-Type: application/json”
Đã có chat ID
Bước 4:
Điền thông tin vào PRTG, truy cập PTRG, setup –> notify template
Sửa or add 1 template
Phần Execute HTTP Action
URL dạng: https://api.telegram.org/bot481775980:NAGtU-UYFQfYhufthedUAwMB2XWzRc8F6AA/sendMessage
HTTP Method: POST
Payload:
chat_id= số chat ID lấy được ở bước trên&text=
[%sensor](%linksensor)
*Last Value* %lastvalue
*Last Message* %lastmessage
*Down since* %since
*Device* %device
*Group* %group&parse_mode=Markdown
Cài đặt python3, và các gói cần thiết
yum install epel-release -y & yum install python36 python36-pip.noarch -y && pip3 install requests

Cách chạy app, sau khi thay cấu hình trong file config.py
cd <đường dẫn thư mục app>
python3 monitor_simple.py

Cách thiết lập chạy mỗi phút 1 lần:
crontab -l
Thêm vào dòng sau:
* * * * * /usr/bin/python3 <đường dẫn file monitor_simple.py>
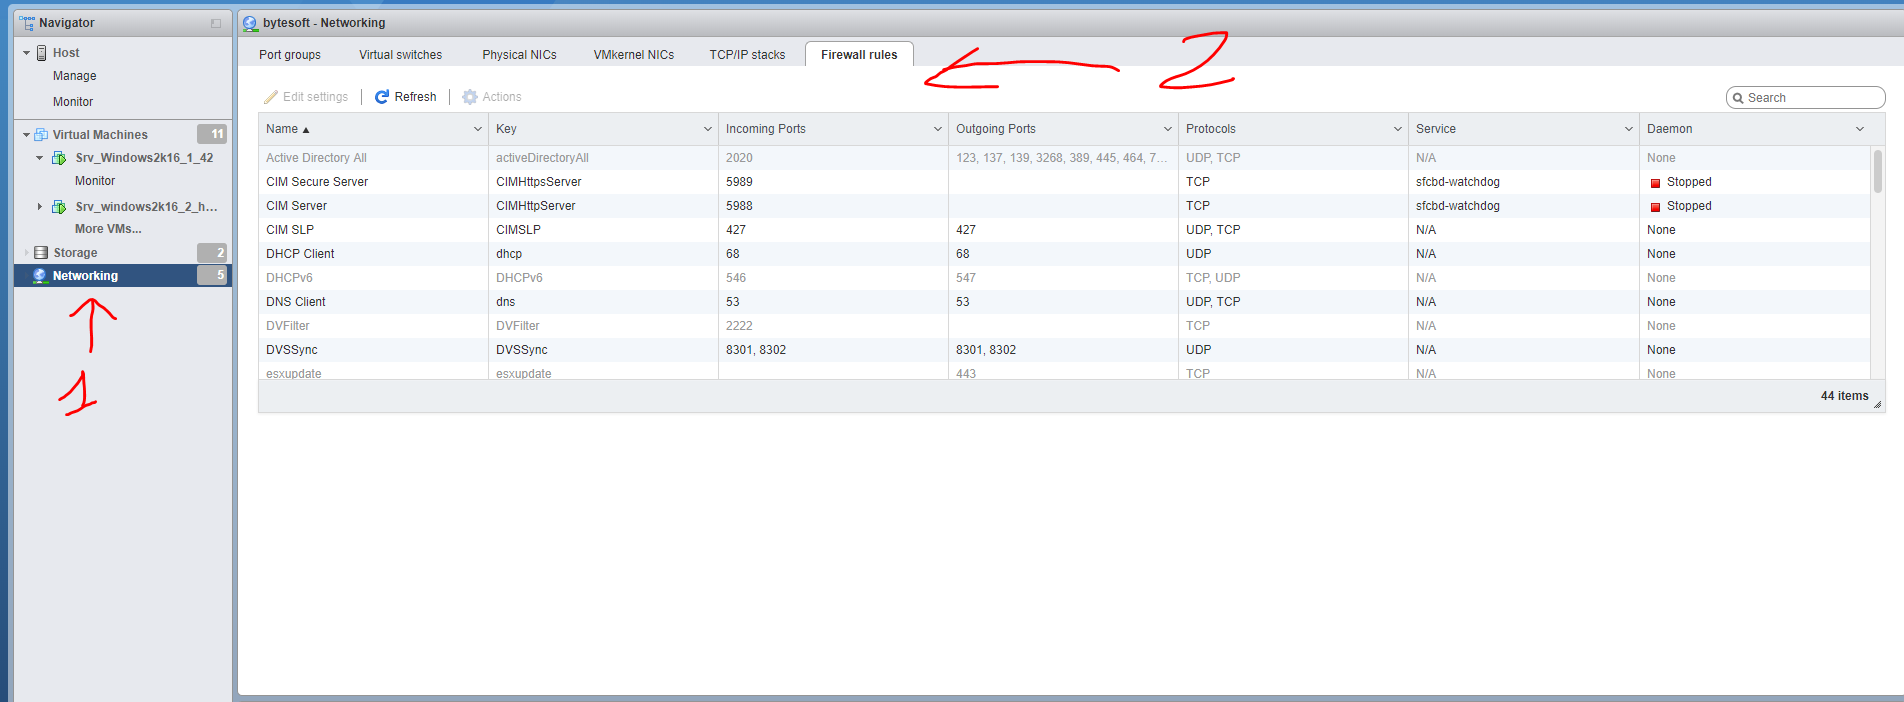
Tương tự ufw, iptable của centos, ubuntu, ESXi cũng có firewall của riêng mình. Mặc định ESXi đã tạo sẵn 1 số rule, chúng ta có thể thao tác với các rule này trên web quản trị
Tuy nhiên một có một số hạn chế như: chỉ đi ra ngoài qua outgoing port mặc định: 80, 22, 443.v.v
Khi đó cần tạo thêm rule mới cho nhu cầu của mình. Cách mở thêm rule như sau:
SSH vào máy chủ ESXi, sửa file /etc/vmware/firewall/custom.xml
nếu không có thì tạo mới.
Thêm rule vào theo định dạng sau:
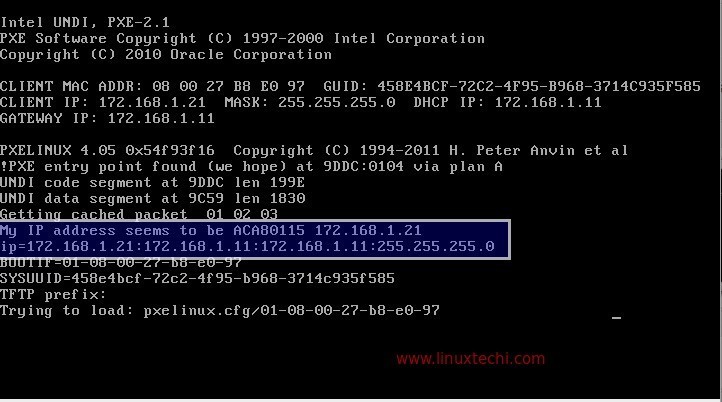
PXE (Preboot eXecution Environment) Server cho phép cài đặt OS qua network, có thể thiết lập tự động chọn các cấu hình ban đầu khi cài đặt OS. Lợi ích chính của việc này đó là chúng ta có thể cài đặt server 1 lần, sau đó sử dụng để cài đặt một cách tự động cho hàng chục, thậm chí hàng trăm máy khác nhau mà không cần phải mất công burn file ISO sang USB hay DVD như trước đây.
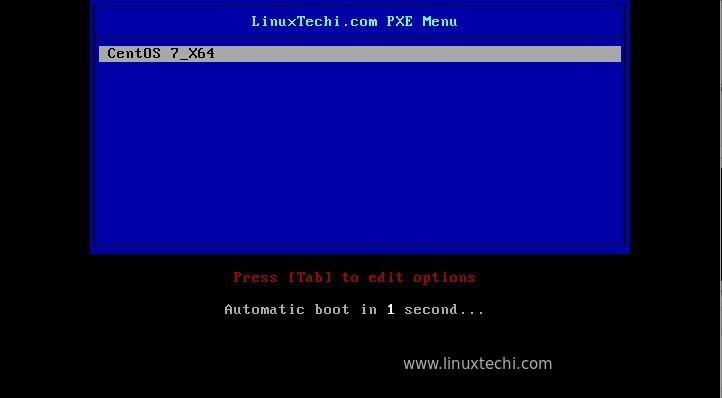
Trong bài viết dưới đây chúng ta sẽ cài đặt 1 PXE server, phục vụ cài centos 7 cho máy khác.
Chi tiết:
Server IP = 192.168.150.11
Host name = pxe.example.com
OS = CentOS 7.x
SELinux = enabled
Firewall = disabled
Step:1 Cài đặt các gói cần thiết cho PXE
Các gói cần thiết: “dhcp, tftp-server, ftp server(vsftpd), xinted”.
Sau khi cài đặt gói dhcp ở trên, chúng ta tạo file cấu hình cho nó có nội dung dưới đây, các bạn có thể thay thế IP tương ứng vủa nhà mình vào.
[root@pxe ~]# vi /etc/dhcp/dhcpd.conf
# DHCP Server Configuration file.
ddns-update-style interim;
ignore client-updates;
authoritative;
allow booting;
allow bootp;
allow unknown-clients;
# internal subnet for my DHCP Server
subnet 192.168.150.0 netmask 255.255.255.0 {
range 192.168.150.21 192.168.150.151;
option domain-name-servers 192.168.150.11;
option domain-name "pxe.example.com";
option routers 192.168.150.11;
option broadcast-address 192.168.150.255;
default-lease-time 600;
max-lease-time 7200;
# IP of PXE Server
next-server 192.168.150.11;
filename "pxelinux.0";
}
Step:3 Cấu hình tftp server (/etc/xinetd.d/tftp)
TFTP (Trivial File Transfer Protocol ) is được sử dụng để tranfer file qua network mà không cần xác thực. Với PXE server, tftp được sử dụng cho bootstrap loading. Để cấu hình tftp server, sửa file ‘ /etc/xinetd.d/tftp’, thay đổi thông số ‘disable = yes‘ -> ‘disable = no’ và để nguyên đám còn lại mặc định, nội dung của nó sẽ tương tự như sau:
[root@pxe ~]# vi /etc/xinetd.d/tftp
service tftp
{
 socket_type = dgram
 protocol    = udp
 wait        = yes
 user        = root
 server      = /usr/sbin/in.tftpd
 server_args = -s /var/lib/tftpboot
 disable     = no
 per_source  = 11
 cps         = 100 2
 flags       = IPv4
}
Toàn bộ các file phục vụ cho việc boot qua network được đặt trong thư mục tftp root “/var/lib/tftpboot”
Chạy các câu lênh sau để chép các file cần thiết vào ‘/var/lib/tftpboot/’
Bước 1: Mở notepad, paste nội dung sau và lưu lại dưới tên active.cmd
@echo off
title Kich hoat Microsoft Office 2019 ALL versions mienphi!&cls&echo ============================================================================&echo #Kich hoat Microsoft Office 2019 hop phap - Khong su dung phan mem&echo ============================================================================&echo.&echo #San pham ho tro:&echo - Microsoft Office Standard 2019&echo - Microsoft Office Professional Plus 2019&echo.&echo.&(if exist "%ProgramFiles%\Microsoft Office\Office16\ospp.vbs" cd /d "%ProgramFiles%\Microsoft Office\Office16")&(if exist "%ProgramFiles(x86)%\Microsoft Office\Office16\ospp.vbs" cd /d "%ProgramFiles(x86)%\Microsoft Office\Office16")&(for /f %%x in ('dir /b ..\root\Licenses16\ProPlus2019VL*.xrm-ms') do cscript ospp.vbs /inslic:"..\root\Licenses16\%%x" >nul)&(for /f %%x in ('dir /b ..\root\Licenses16\ProPlus2019VL*.xrm-ms') do cscript ospp.vbs /inslic:"..\root\Licenses16\%%x" >nul)&echo.&echo ============================================================================&echo Activating your Office...&cscript //nologo ospp.vbs /unpkey:6MWKP >nul&cscript //nologo ospp.vbs /inpkey:NMMKJ-6RK4F-KMJVX-8D9MJ-6MWKP >nul&set i=1
:server
if %i%==1 set KMS_Sev=kms7.MSGuides.com
if %i%==2 set KMS_Sev=kms8.MSGuides.com
if %i%==3 set KMS_Sev=kms9.MSGuides.com
if %i%==4 set KMS_Sev=kms.digiboy.ir
if %i%==5 goto notsupported
cscript //nologo ospp.vbs /sethst:%KMS_Sev% >nul&echo ============================================================================&echo.&echo.
cscript //nologo ospp.vbs /act | find /i "successful" && (echo.&echo ============================================================================&choice /n /c YN /m "Truy cap devopsvn.xyz: [Y,N]?" & if errorlevel 2 exit) || (echo Ket noi voi may chu KMS khong thanh cong! Dang ket noi lai... & echo Vui long cho... & echo. & echo. & set /a i+=1 & goto server)
explorer "https://devopsvn.xyz"&goto halt
:notsupported
echo.&echo ============================================================================&echo Phien ban Office cua ban khong duoc ho tro.&echo Download phien ban moi nhat tai day: http://devopsvn.xyz/:halt
pause >nul
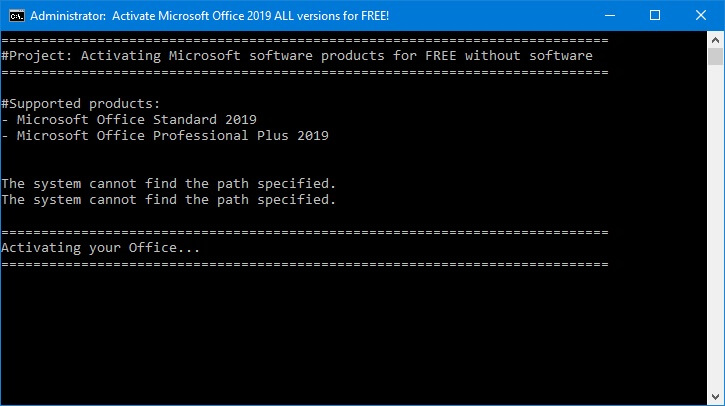
Bước 2: mở file active.cmd vừa tạo dưới quyền administrator và ngồi chờ. Thành công sẽ báo
Một số lưu ý:
INVENTORY_LOCATION : đường dẫn thư mục này phải khác với đường dẫn cho ORACLE_HOME và ORACLE_BASE
đường dẫn ORACLE_HOME nên nằm bên trong ORACLE_BASE
oracle.install.client.installType nên để Administrator, sau này sẽ có nhiều tùy chỉnh hơn.
UNIX_GROUP_NAME: Oracle client không cài được dưới user root, nên phải tạo user khác cho nó, group tương ứng với user đó là gì thì điền vào đây, Group này phải có quyền đọc ghi , exec tất cả các đường dẫn đã khai báo trên. (dùng đường dẫn nào thì vào chown cho nó)
Sau khi khai báo, đứng ở thư mục chứa file runInstaller ở trên, chạy:
Nhớ thay đường dẫn đúng vào file client_install.rsp ở trên.
Sau khi chạy, sẽ hiển thị dạng:
[oracle@testora client]$ ./runInstaller -silent -responseFile /opt/client/response/client_install.rsp
Starting Oracle Universal Installer...

Checking Temp space: must be greater than 415 MB.   Actual 32130 MB    Passed
Checking swap space: must be greater than 150 MB.   Actual 3967 MB    Passed
Preparing to launch Oracle Universal Installer from /tmp/OraInstall2019-06-22_01-52-44PM. Please wait ...
[oracle@testora client]$
[oracle@testora client]$
[oracle@testora client]$ [WARNING] [INS-13014] Target environment does not meet some optional requirements.
   CAUSE: Some of the optional prerequisites are not met. See logs for details. installActions2019-06-22_01-52-44PM.log
   ACTION: Identify the list of failed prerequisite checks from the log: installActions2019-06-22_01-52-44PM.log. Then either from the log file or from installation manual find the appropriate configuration to meet the prerequisites and fix it manually.
You can find the log of this install session at:
 /u01/oracle/ora_inventory/logs/installActions2019-06-22_01-52-44PM.log
The installation of Oracle Client 12c was successful.
Please check '/u01/oracle/ora_inventory/logs/silentInstall2019-06-22_01-52-44PM.log' for more details.

As a root user, execute the following script(s):
        1. /u01/oracle/ora_inventory/orainstRoot.sh


Successfully Setup Software.

[oracle@testora client]$
Làm theo hướng dẫn, chuyển qua user root, chạy /u01/oracle/ora_inventory/orainstRoot.sh là xong.
Print Spooler Error code 3. The system cannot find the path specified
Không thể start service print spooler, báo lỗi như trên, mở properties của service thì thấy execute path không có gì. Có thể xử lý như sau:
HKEY_LOCAL_MACHINE\SYSTEM\CurrentControlSet\services\Spooler registry key and right-click Spooler > New > Expandable String Value > then name the value ImagePath then double-click ImagePath and type (or copy and paste) the following under "Value data":
%SystemRoot%\System32\spoolsv.exe
Then press "OK"
Close regedit and see if you can start the Print Spooler service.


 Tuy nhiên một có một số hạn chế như: chỉ đi ra ngoài qua outgoing port mặc định: 80, 22, 443.v.v
Khi đó cần tạo thêm rule mới cho nhu cầu của mình. Cách mở thêm rule như sau:
SSH vào máy chủ ESXi, sửa file /etc/vmware/firewall/custom.xml
nếu không có thì tạo mới.
Thêm rule vào theo định dạng sau:
Tuy nhiên một có một số hạn chế như: chỉ đi ra ngoài qua outgoing port mặc định: 80, 22, 443.v.v
Khi đó cần tạo thêm rule mới cho nhu cầu của mình. Cách mở thêm rule như sau:
SSH vào máy chủ ESXi, sửa file /etc/vmware/firewall/custom.xml
nếu không có thì tạo mới.
Thêm rule vào theo định dạng sau: